
Have you ever wondered about the different techniques used with table saws? Well, you’re not alone.
Many people ask me about these techniques frequently. That’s why I decided to share the basic techniques with you in this article.
These methods are considered the best because they give efficient results and produce precise cuts when working with plywood, hardwood, or other types of wood.
By the end of this article, you’ll have all the information you need for these types of jobs.
So, if you want to learn about how table saws work, safety tips and tricks, and various cutting techniques, keep reading.
Why do you need a Table Saw?

A table saw is a really important tool if you’re working with various types of wood and if you’re looking for a tool that provides a number of features and benefits whether you’re a professional woodworker or a DIY enthusiast.
Here are some key reasons why you need a table saw:
Precise and Accurate Cuts
Table Saws provides exceptional precision and accuracy when it comes to cutting different types of materials including wood, plywood, or other types of wood.
The smooth table surface of the table saw alongside the adjustable fence and miter gauge enables the user to make straight and controlled cuts.
Versatility
Table saws are really versatile when it comes to dealing with different types of materials. These table saws can perform a variety of cuts including:
- Rip cuts
- Crosscuts
- Bevel cuts
- Joinery cuts
These cuts can be performed easily but the help of special blades and some additional accessories that can be attached to the table saw.
Increased Efficiency
Table Saw enables you to quickly and efficiently make multiple cuts as many times as you want, saving a huge load of time and effort. Table Saws enable you to handle large wood pieces of different types and handle complex woodworking projects easily and efficiently.
Safety Features
Modern table saws provide a variety of safety features like blade guards, riving knives, and anti-kickback mechanisms that help in the complete prevention of accidents or any type of mishaps that ensure user safety in all circumstances. These features help the user in protecting their hands from any type of cuts and minimize the risk of kickback.
Customizable
Table saws often come with a variety of accessories and a number of attachments that can be easily used with the table saws. These accessories and attachments allow the user to easily customize the table saw and expand their capabilities, efficiency, and functionalities according to the project they’re dealing with. The accessories include jigs, sleds, dado blades, etc.
Professional Finish
Table Saw helps you in achieving professional level results in all the woodworking projects you’re dealing with in really less time, with less effort involved, and with high efficiency. It provides clean and smooth cuts on the surface you’re dealing with and makes it suitable for you when you’re dealing with projects of high precision and finishing. Examples are cabinetry, furniture making and trim work, etc.
Table Saws are really versatile and durable tools that enhance your woodworking capabilities, improve efficiency, and help you in achieving the professional results you’re looking for
Is a 10-inch table saw an ideal choice?
The 10-inch table saw is often considered a really suitable and ideal choice for many woodworking applications and that is because of a number of reasons which I’m going to tell you about directly below:
Common Blade Size
The 10-inch size is really common and is widely available across markets. These blades also come in a variety of types, including rip blades, crosscut blades, or combination blades. This makes it really easy to find the right blade for specific cutting needs according to the project you’re dealing with.
Versatility
It is really versatile in nature and is really strong enough to handle a wide range of cutting tasks involving different types of wood. This table saw can effectively cut through various different types of materials, including plywood, hardwood, softwood, and even some metal materials.
Balance of Power and Precision
This table saw provides a really impressive balance between both power and precision. These table saws provide sufficient power while dealing with materials of hard types and maintaining the property of precision i.e., efficient and precise cuts alongside which makes this table saw really remarkable.
Suitable for Small to Medium-Sized Projects
It is really well-suited for different types of projects specifically small to medium-sized projects which are commonly handled in home workshops, DIY projects, and general based woodworking. It also has the capability to handle tasks like ripping boards, crosscutting, bevel cuts, and joinery with ease and efficiency.
Portability
These table saws are more portable and easier to carry from one place to another as compared to other table saws which are larger in size. This can be a really big advantage if you want to move the table saw around a job site or if you have limited workshop space.
Cost-Effective
They are also more cost-effective than other table saws. These table saws generally offer good value for the features and performance they provide at a reasonable price. They are often more affordable and cheaper as compared to the larger table saws, making them a more suitable and practical choice for hobbyists, DIYers, and those who have a low budget.
While this table saw may not be suitable for extremely large or heavy-duty projects, it is a versatile and suitable choice for most woodworking enthusiasts due to its balance of power, precision, and affordability.
How to Use a Table Saw (Step-by-Step Guide)
You need to know the table saw before you operate one, there are a set of steps that need to be followed to ensure proper working of the table saw and to ensure accurate and precise results.
Let us dive into the set of steps to follow to operate a table saw with complete safety precautions in order to ensure safety and precision:
1. The Setup
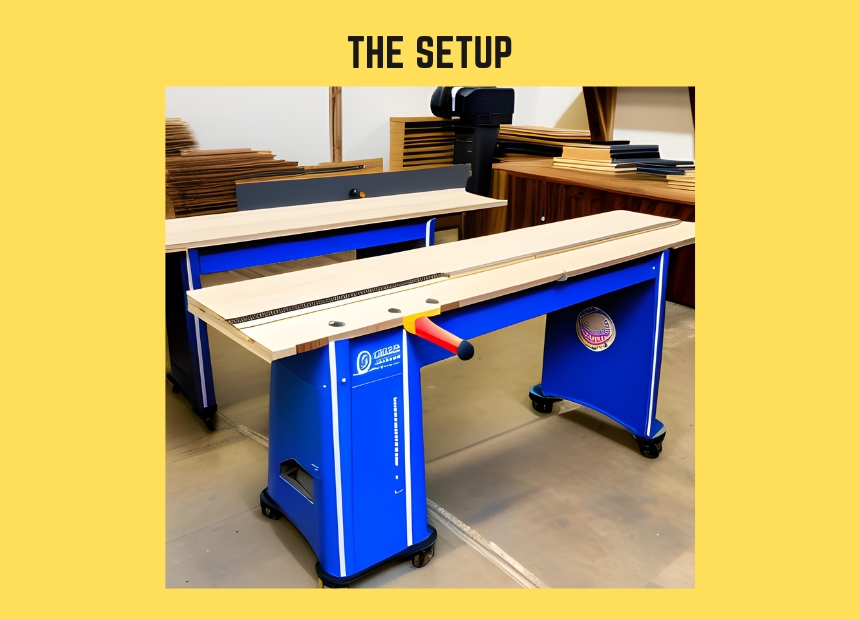
The first step is to start the entire process by setting up the table saw on a stable surface that doesn’t vibrate or anything. After this ensure that it is securely and properly placed in the position you want and the power cord is connected to a power source which can be turned on later on.
2. Adjust the Table
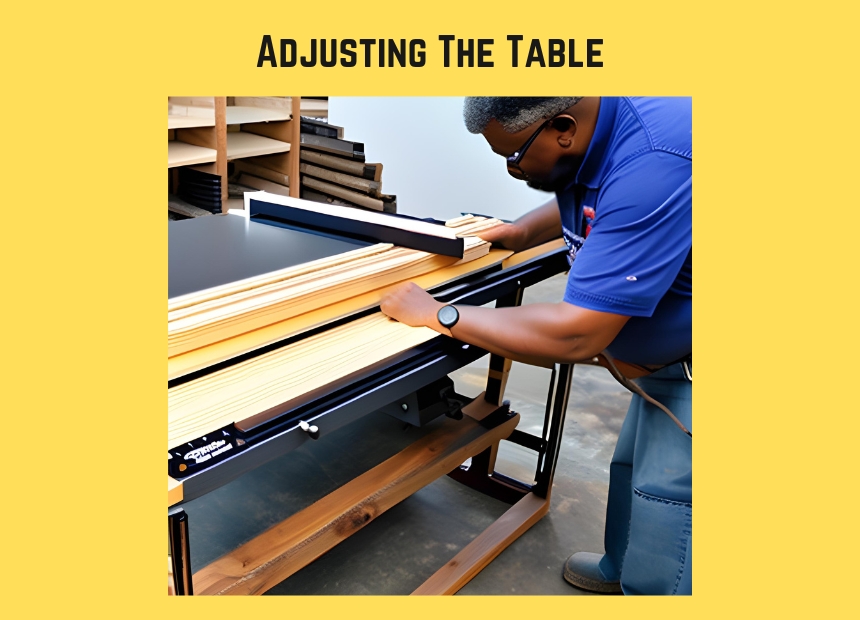
You have to make the adjustments properly. You just need to adjust the blade height and angle as per your cutting requirements. Most of the table saws, have a blade height adjustment wheel or handle to raise or lower the blade to a certain height, and a bevel adjustment mechanism to tilt the blade for angled cuts according to the project you’re dealing with.
3. Fix up the fence and gauge
After making the desired adjustments according to the project you’re dealing with. You’ll have to adjust the rip fence and miter gauge to properly guide the material you’re dealing with during cutting. The rip fence in a table saw is used for making parallel cuts along the length of the material you’re dealing with, while the miter gauge allows for angled or crosscutting of the material.
4. Safety is Important
Safety precautions hold a lot of importance when it comes to dealing with different types of tools specifically table saws. So, before starting the table saw, ensure that all safety features are in place and are fully functional. The safety features include the blade guard, riving knife, and anti-kickback pawls. These components hold a lot of importance as they help in preventing accidents and protect the operator from potential hazards.
5. Power On
After checking and ensuring the safety precautions. You need to turn on the power to the table saw using the power switch or button. You need to make sure that the cutting blade is not in contact with the material you’re dealing with before turning on the saw.
6. Cut Gently
After turning on the power of your table saw; the cutting process starts. You need to position the material or object you’re handling against the rip fence or miter gauge, depending on the desired cut you want and how precise it should be. Just slowly move the workpiece towards the spinning blade, keeping a firm grip on the pieces and maintaining a consistent feed rate to avoid inconsistency. You should avoid forcing the material through the cut, as it can result in kickback or blade binding.
7. Post Cutting
After you’ve finished cutting the workpiece, you should release the pressure on the workpiece and allow the blade to stop moving completely. Remove the workpiece from the table saw as the cut is completed, making sure that your hands are clear of the blade and other moving parts of the table saw.
8. The Cleanup
As the cutting process has been completed successfully and the workpiece has been taken off the table saw; the cleanup process comes. Clean the table thoroughly removing any kind of dust or dirt particles or debris that has been collected on the table and clean the table completely. This helps maintain the performance and the table saw lasts longer.
It’s important to note that these steps provide a general overview of how an average table saw works. Always you should refer to the specific manufacturer’s instructions and follow proper safety guidelines when operating a table saw of a specific brand.
How to Operate Table Saw Safely?
Table saws can prove to be dangerous in terms of their processing and their working so safety precautions need to be taken care of in order to take care of a person during their working so safety features come in here.
They have several safety features in place to help prevent accidents and protect the user. Here are some common safety mechanisms found in table saws:
Blade Guard
The blade guard is a protective covering that encloses the spinning blade. It helps prevent accidental contact with the blade and shields the operator from flying debris. It is important to keep the blade guard properly installed and adjusted for safe operation.
Riving Knife
A riving knife is a vertical projection located behind the blade. It helps prevent the workpiece from pinching or binding against the back of the blade, reducing the risk of kickback. The riving knife moves up and down with the blade, ensuring a consistent distance between the blade and the splitter.
Anti-Kickback Pawls
Anti-kickback pawls are small, toothed devices attached to the riving knife or splitter. They help prevent the workpiece from being propelled backward or lifted by the spinning blade during cutting. The pawls engage the workpiece and allow it to move in one direction only.
Push Stick
A push stick is a device used to safely guide the workpiece through the cut, keeping the operator’s hands at a safe distance from the blade. It provides better control and reduces the risk of accidental contact with the blade.
Emergency Stop Button
Many table saws are equipped with an emergency stop button or switch. This allows the operator to quickly shut off the power to the saw in case of an emergency or to stop the blade immediately if needed.
Fence and Miter Gauge
The rip fence and miter gauge help guide the workpiece during cutting, ensuring accurate and controlled cuts. Properly adjusted and securely locked-in position, they provide stability and prevent the workpiece from wandering or tilting into the blade.
8 Different Table Saw Cutting Techniques
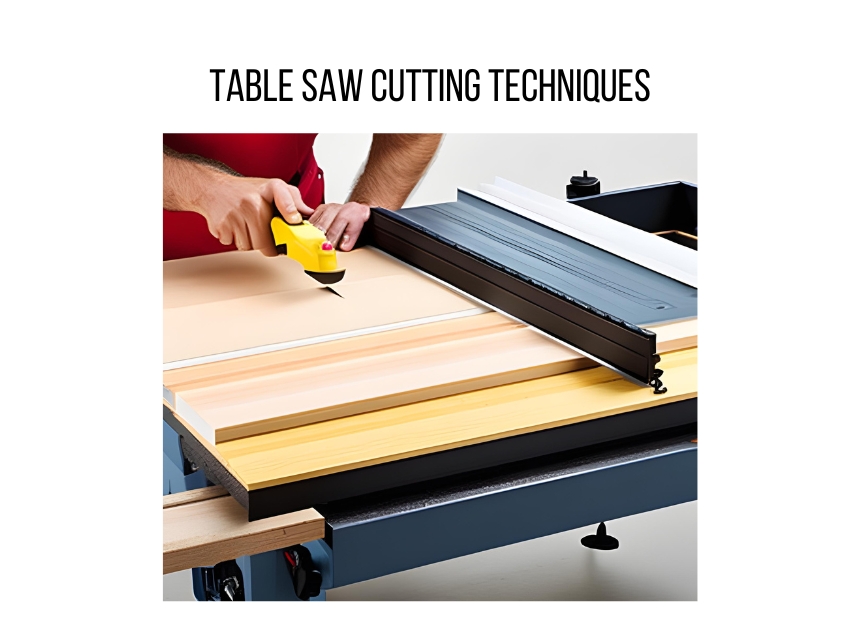
Different materials can be dealt with and cut easily using table saws using different types of cutting techniques and I’ll tell you all about these techniques right below. Dealing with different types of materials may require specific techniques in order to deal with them accordingly and in order to get accurate results and high precision with the projects you’re dealing with.
The techniques are mentioned and explained briefly down:
Rip Cut
A rip cut is a type of cut made along the length of a workpiece, parallel to the grain of the wood. It involves cutting a piece of material into narrower strips or boards.
The main purpose of a rip cut is to reduce the width of the wood piece you’re working with or to create multiple narrower pieces from a larger board. The rip cut is typically performed by guiding the wood piece along the rip fence, which is set parallel to the blade. This ensures a straight and consistent cut.
The rip fence is set at the desired distance from the blade, ensuring a straight and consistent cut. Rip cuts are frequently used in woodworking projects, such as creating panels, trim pieces, or joining boards together to construct larger structures.
Crosscut
The next worth mentioning table saw cutting technique is cross cut. A cross cut in cutting refers to a type of cut made with the table saw blade perpendicular to the direction of the wood grain. It involves cutting a wood piece across its width, creating shorter pieces, or making precise angled cuts with high efficiency.
Cross cuts are commonly used in woodworking to create accurate and square end cuts, miter cuts, or angled cuts for joinery or fitting pieces together.
To make a crosscut on a table saw, the wood piece is typically guided against a miter gauge or a crosscut sled, making sure a precise and controlled cut is made. The ability of a table saw to make accurate and clean cross cuts is essential for many woodworking projects.
Dado Cut
Next up is the Dado Cut. A dado cut refers to a specific type of cut made to create a wide and flat-bottomed slit or passage way in the material you’re working with.
The dado cut is commonly used in woodworking for joinery purposes, such as creating slots for shelves or panels to fit into. It allows for precise and consistent results when creating strong and secure connections between pieces of wood.
To make a dado cut on a table saw, a dado blade set or a dado stack is used, which consists of multiple blades or chippers that can be stacked together to create the required width of the slit. The depth of the dado cut is adjusted by raising or lowering the blades accordingly. By carefully guiding the wood piece along the table saw fence and bypassing the wood multiple times, a clean and accurate dado cut can be achieved.
Rabbet Cut
A rabbet cut is a type of cut that is made to create a corner or slit along the edge or the surface of the material you’re dealing with.
The purpose of a rabbet cut is to create a joint or allow another piece of wood to fit into the slit, forming a strong and secure connection. It is commonly used in woodworking for tasks such as joining boards together or creating inset panels.
To make a rabbet cut on a table saw, a dado blade set or a rabbeting bit can be used. The depth and width of the rabbet cut can be adjusted by setting the height and position of the blade or bit, as well as adjusting the fence position. A precise and accurate rabbet cut can be made by passing the wood piece a number of times.
Bevel Cut
A bevel cut is also called an angled cut which is made on the edge or surface of the material you’re dealing with. Unlike a straight cut, which is made at a 90-degree angle to the wood piece, a bevel cut is made at an angle other than 90 degrees.
This angled cut is commonly used to create beveled edges, chamfers, or angled joints in woodworking projects.
To make a bevel cut on a table saw, the angle of the blade needs to be adjusted. Most table saws have a bevel adjustment mechanism that allows you to tilt the blade to the desired angle. It’s important to make sure that the wood piece is properly secured and that the blade is aligned correctly to achieve accurate and clean bevel cuts.
Miter Cut
A miter cut is also an angled cut just like the bevel cut but it is made across the width of the material, unlike the bevel cut.
It is commonly used to create angled joints, such as when making frames or trim pieces. A miter cut is made by adjusting the miter gauge on the table saw. The miter gauge allows you to set the desired angle for the cut, typically ranging from 0 to 45 degrees.
This cut allows you to get accurate angles and make tight-fitting joints in your woodworking projects. Miter cuts are commonly used in applications such as picture frames, crown molding, and furniture construction.
Compound Cut
Now talking about the compound cut. It combines both a bevel and a miter angle simultaneously. It involves tilting the blade of the table saw to a specific angle and also setting the miter gauge to a specific angle.
This allows for angled cuts in two planes, resulting in complex and precise cuts on the wood piece.
Compound cuts are commonly used in woodworking projects where multiple angled surfaces need to be created, such as when constructing furniture, trim work, or complex joinery. The ability to make compound cuts on a table saw offers versatility and allows for the creation of intricate and customized designs.
Resawing
The last cutting technique is Resawing. It is the process of cutting a board or plank into thinner slices along its width. It involves making a vertical cut through the thickness of the material, creating two or more thinner pieces.
Resawing is typically used to create thinner boards for various woodworking projects, such as making veneers or obtaining thinner stock for joinery work. It allows for maximizing the yield from a single piece of wood and offers flexibility in working with different thicknesses of lumber.
To perform a resaw cut on a table saw, a tall fence and a high-quality blade with a narrow slit are typically used to make sure that the results are accurate and the cuts are smooth.
Bottom Line
A table saw is a must-have tool for woodworking. With its precision and versatility, it makes cutting tasks really time effective, cost effective, and efficient. But, like any tool, safety and proper usage hold a lot of importance.
You should ensure safety by making yourself familiar with the safety features of the table saw including blade guard, riving knife, and anti-kickback pawls. You should wear protective gear like glasses and earplugs.
You should position yourself correctly, maintain control during the work, and use push sticks during it’s working. You should choose the right blade for your task and the material you’re dealing with.
Always keep in mind that regular maintenance keeps your table saw in top shape. You should clean the table properly, check the blade after working, and lubricate moving parts to keep the table saw smooth at all times.
By following these guidelines, you’ll extend your table saw’s lifespan and enjoy precise woodworking. Remember to consult the manufacturer’s instructions and seek professional advice when needed.
The best table saw for you is that which meets all the needs of performance, and accuracy and is able to make different types of cuts as I have mentioned above easily. So, keeping in view all that you should choose the best table saw for yourself.